Blog Article
Plant Propagation Guide: Expand Your Collection for Free!
Master plant propagation with our ultimate guide! Learn how to propagate plants, including stem cuttings and leaf propagation, to expand your collection easily.
Plant Propagation Guide: Expand Your Collection for Free!
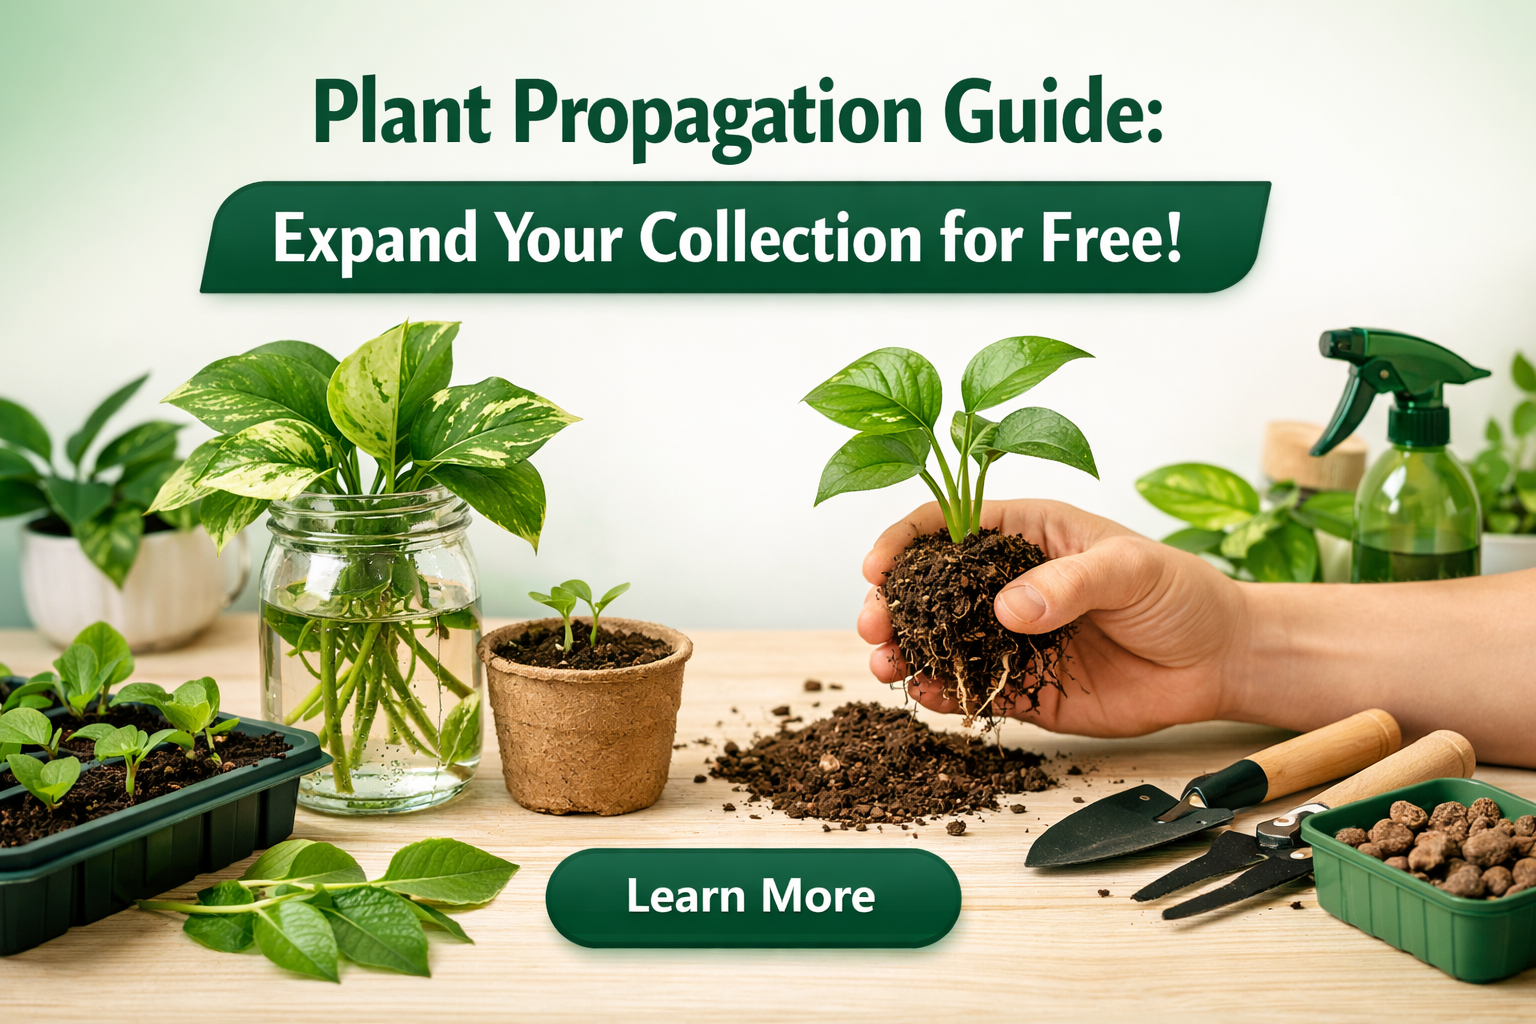
Are you an indoor plant enthusiast looking to grow your green family without constantly buying new plants? Then it's time to dive into the wonderful world of plant propagation! This comprehensive guide will teach you how to propagate plants, allowing you to multiply your beloved houseplants, share them with friends, and even revive struggling specimens. Propagation is not just a cost-effective way to expand your collection; it's a deeply rewarding experience that connects you more intimately with the life cycle of your plants.
Many popular houseplants, from the sprawling Pothos to the architectural Snake Plant, can be easily propagated right in your home. Imagine turning one healthy plant into three, five, or even ten new ones, all for free! Whether you're a seasoned plant parent or just starting your green journey, understanding how to propagate plants is a game-changer for anyone wanting to nurture a thriving indoor jungle. This guide will walk you through the most common and effective propagation methods, ensuring your success from cutting to rooted plant.
Unlock the Magic of Plant Propagation: Why Do It?
The allure of plant propagation goes beyond simply getting more plants. It's an engaging and sustainable practice that offers numerous benefits to any indoor gardener. By learning to reproduce your plants, you tap into a natural cycle of growth and renewal that can transform your plant care routine into a more dynamic and interactive hobby. This process is deeply satisfying, providing a sense of accomplishment as you watch new life emerge from a tiny cutting.
One of the most immediate advantages of propagation is the cost savings. Instead of heading to the nursery every time you want a new variety or an extra specimen, you can simply take a cutting from an existing plant. This not only keeps your wallet happy but also reduces your environmental footprint by minimizing the need for new plastic pots and transportation. Furthermore, propagating allows you to create unique gifts for friends and family, sharing the joy of plant parenthood.
The Joy of Expanding Your Green Family
There’s a unique satisfaction that comes from creating a new plant from an existing one. It's a testament to your care and understanding of plant needs, fostering a deeper connection with your indoor garden. Propagating also ensures that you maintain a genetic backup of your favorite or rare plants. Should a parent plant suffer from disease or pests, having a few propagations rooting nearby means you haven't lost the plant entirely. It's a natural form of insurance for your cherished collection.
Propagation also offers an opportunity for experimentation. You can try different methods, observe how various plants respond, and truly become an expert in your own home environment. For instance, propagating a trailing plant like a Pothos allows you to fill out a sparse pot by planting multiple rooted cuttings together, creating a fuller, more lush appearance. If you're new to houseplants, consider checking out our Ultimate Beginner Houseplant Guide: Start Your Green Journey Today for more foundational knowledge.
Saving Money & Resources
Beyond the intrinsic joy, the financial benefits of plant propagation are clear. High-quality houseplants can be expensive, especially if you’re trying to build a diverse collection. By propagating, you turn a one-time purchase into an endless supply. This makes it an incredibly sustainable and budget-friendly practice. You can even trade cuttings with other plant enthusiasts, further diversifying your collection without spending a dime.
From a resource perspective, propagation encourages you to use what you already have. Instead of buying new soil, you might repurpose existing potting mix (sterilized, of course, for new cuttings) or use a simple glass of water. This lean approach aligns with eco-conscious living, reinforcing the idea that gardening doesn't have to be a consumption-heavy hobby. It transforms your existing plants into renewable resources, endlessly providing new green life.
Popular Propagation Methods: Cuttings, Divisions, & More
When it comes to how to propagate plants, there are several tried-and-true methods, each suited to different types of plants. Understanding these techniques is key to successful multiplication of your green companions. While some plants can be propagated from seeds or by air layering, the most common and accessible methods for indoor plant enthusiasts are stem cuttings, leaf cuttings, and division. These methods are relatively simple and have a high success rate, making them perfect for beginners.
Choosing the right method often depends on the plant's natural growth habit. For instance, vining plants like Pothos and Philodendrons are excellent candidates for stem cuttings, while succulents and certain leafy plants respond well to leaf propagation. Plants that grow in clumps, such as Snake Plants or Prayer Plants, are ideal for division. Let’s explore these methods in more detail to help you decide which is best for your current plant project.
Stem Cuttings: Your Go-To Method
Stem cuttings are arguably the most popular and easiest way to propagate many common houseplants. This method involves taking a section of a stem that includes at least one "node" – the small bump or joint where leaves or roots emerge. Plants like Pothos, Philodendron, Monstera, and even some Ficus varieties thrive with stem cuttings. The key is to make a clean cut just below a node, ensuring you have enough stem above and below for rooting.
After taking your cutting, you'll typically remove the lower leaves to prevent them from rotting in water or soil, redirecting the plant's energy towards root development. You can then place these cuttings directly into water or a moist rooting medium. Patience is crucial here; roots can take anywhere from a few days to several weeks to appear. For a classic example, check out our Pothos Plant Care Made Easy: A Beginner's Guide to Trailing Beauty, which often involves propagation to create a fuller plant.
Leaf Cuttings: Patience for Pups
For succulents like Echeveria, Sedum, and Sansevieria (Snake Plant), leaf propagation is a fantastic method. This involves carefully removing a healthy, intact leaf from the parent plant. The entire leaf, including the base where it attaches to the stem, is vital for success. Unlike stem cuttings, leaf cuttings don't typically grow roots directly from the leaf; instead, tiny "pups" (new baby plants) will emerge from the base of the leaf.
After removing the leaf, it's often recommended to let it "callus" for a few days in a dry, shaded spot. This helps prevent rot when the leaf is eventually placed on soil. Once callused, lay the leaf flat on moist soil, ensuring the cut end has good contact. While this method can be slower than stem cuttings, the reward of seeing a tiny new plant sprout from a single leaf is incredibly satisfying. For specifics on one popular choice, see our Snake Plant Care Guide: Thriving with Sansevieria.
Plant Division: Splitting for Growth
Plant division is ideal for plants that grow in clumps or have multiple stems emerging from a central root ball. This method is less about creating an entirely new plant from scratch and more about separating an existing, mature plant into two or more smaller, viable plants. Good candidates for division include ZZ plants, peace lilies, ferns, and many prayer plants. This method is often performed when a plant becomes pot-bound or simply too large for its space.
To divide a plant, carefully remove it from its pot and gently tease apart the root ball into sections, ensuring each section has a healthy portion of roots and foliage. Sometimes, a clean knife or pruners are needed for tougher root systems. Once divided, repot each new section into its own pot with fresh potting mix. This process not only gives you more plants but also revitalizes the parent plant, encouraging new growth.
Step-by-Step: Propagating in Water vs. Soil
Once you've chosen your propagation method and taken your cuttings, the next critical step is deciding where to root them: water or soil. Both methods have their pros and cons, and the best choice often depends on the plant species and your personal preference. Understanding the nuances of each will significantly increase your success rate in how to propagate plants.
Regardless of the method, cleanliness is paramount. Always use sterilized tools to prevent the spread of diseases. A sharp, clean pair of scissors or pruning shears will make a precise cut, minimizing damage to the plant tissue. Remember, you're encouraging delicate new growth, so a healthy start is essential.
Water Propagation: Watching Roots Grow
Water propagation is often favored by beginners because it allows you to visually monitor root development, which is incredibly exciting! For this method, simply place your prepared stem cuttings into a clear glass or jar filled with fresh, dechlorinated water. Ensure that only the node(s) where you want roots to form are submerged, with leaves remaining above the waterline.
Change the water every few days to keep it fresh and prevent bacterial growth. Place the container in a spot with bright, indirect light – direct sun can be too intense for delicate new roots. Within weeks, you'll start to see tiny white roots emerging. Once the roots are a few inches long (typically 1-3 inches, depending on the plant), they are ready to be transitioned to soil. This transition can be a delicate period, as water roots are accustomed to a liquid environment and may struggle slightly to adapt to soil.
Soil Propagation: A Direct Approach
Soil propagation involves planting your cuttings directly into a moist potting mix. This method is often preferred for plants that are more susceptible to shock when transitioning from water to soil, or for leaf cuttings that naturally root better in a solid medium. A well-draining, light potting mix is crucial – a mix of peat moss, perlite, and a bit of compost often works well.
After preparing your cutting (and letting leaf cuttings callus), insert the cut end into the moist soil, ensuring at least one node is buried. For leaf cuttings, lay them flat on the soil surface. Some people dip the cut end into rooting hormone powder before planting, which can accelerate root development, especially for more challenging plants. Keep the soil consistently moist but not waterlogged, and place the pot in a warm spot with bright, indirect light. You won't see roots immediately, but you'll know it's working when you feel resistance if you gently tug the cutting, or when new growth appears.
Essential Tools & Supplies
Successful propagation doesn't require a vast array of specialized equipment, but a few key items can significantly improve your chances.
- Sharp, clean pruning shears or scissors: For making precise, sterile cuts.
- Clear glass jars or small pots: For water propagation or individual soil cuttings.
- Well-draining potting mix: Essential for soil propagation. Consider a seedling mix or adding perlite for extra drainage.
- Rooting hormone (optional): A powder or gel that can stimulate root growth.
- Spray bottle: To maintain humidity for cuttings.
- Propagator dome or plastic bag (optional): To create a mini-greenhouse effect and maintain humidity.
You can find many of these items in our Shop Curated Plant Care Products: Everything Your Plants Need in One Place. Having the right tools makes the process smoother and more enjoyable.
Caring for Your New Plant Babies: A Beginner's Timeline
The journey doesn't end once your cuttings have rooted. The period after successful propagation, often referred to as the "nursery stage," is crucial for the long-term health of your new plant babies. This phase involves careful monitoring of light, water, humidity, and eventually, transitioning them into their permanent homes. How to propagate plants successfully also means knowing how to nurture them through this delicate stage.
New propagations are often more sensitive than mature plants and require a gentle touch. They are focusing all their energy on developing a strong root system and new foliage, so providing optimal conditions will give them the best start in life. Avoid drastic changes in environment, and be patient – plant growth is a marathon, not a sprint.
From Cuttings to Potted Plants
If you started with water propagation, the transition to soil is a critical step. Water roots are typically finer and less robust than soil roots. To minimize shock, plant your rooted cutting into a small pot (e.g., 4-inch) with fresh, well-draining potting mix. Keep the soil consistently moist for the first few weeks after transplanting, gradually reducing watering frequency as the plant establishes itself. This mimics the moist environment the roots were used to in water.
For soil-rooted cuttings, simply continue to care for them in their initial pots. Once they show significant new leaf growth and have developed a robust root ball (you can gently check by tipping the plant out of its pot), they are ready for a larger pot. Always choose a pot that is only slightly larger than the current root ball to prevent overwatering.
Light, Humidity, and Temperature Needs
New plant babies, whether in water or soil, generally thrive in bright, indirect light. Direct, harsh sunlight can scorch delicate new leaves and stress the developing root system. A north-facing window or a spot a few feet away from an east or west-facing window is usually ideal. If natural light is insufficient, a grow light set to a lower intensity can be beneficial. For tips on enhancing light, consider our guide on Grow Lights for Houseplants: Your Complete Guide & Product Picks.
High humidity is often beneficial for new propagations, especially those rooting in soil. This helps prevent the leaves from drying out while the roots are still establishing. You can achieve this by misting regularly, placing the pots on a pebble tray with water, or using a humidity dome or plastic bag over the cutting (ensure good air circulation to prevent mold). Consistent, warm temperatures (around 65-75°F or 18-24°C) also encourage faster rooting and growth.
Troubleshooting Common Issues
Even with the best intentions, you might encounter some setbacks. If your cuttings are failing to root, consider these common culprits:
- Lack of nodes: Ensure your stem cutting includes at least one node.
- Rot: Too much moisture, old water, or non-sterile tools can lead to rot. Remove any rotting parts and try again.
- Insufficient light: Too little light can slow down or halt rooting.
- Too much light/heat: Can dry out cuttings or scorch tender new growth.
- Impatience: Some plants simply take longer to root than others.
Don't be discouraged if your first attempt isn't a 100% success. Propagation is a learning process. For more general help, our Houseplant Troubleshooting: Common Issues & Quick Fixes might offer additional insights. Patience and observation are your best tools!
Plant Propagation FAQ
Q: How long does plant propagation take? A: The time frame varies significantly by plant type and method. Some plants, like Pothos, can show roots in water within 1-2 weeks. Others, such as succulents from leaf cuttings, might take several months for new pups to appear. Generally, expect anywhere from 2 weeks to 3 months for viable roots or new growth.
Q: Can all houseplants be propagated? A: While many houseplants can be propagated, not all can be done easily by common methods like stem or leaf cuttings. Some plants are best propagated by division, air layering, or seeds. Always research the specific propagation needs of your plant.
Q: Do I need rooting hormone? A: Rooting hormone is not always necessary but can significantly increase the success rate and speed up root development, especially for plants that are a bit more challenging to propagate. It's an optional tool, not a mandatory one for most easy-to-propagate plants.
Q: When should I transfer water-rooted cuttings to soil? A: Transfer your cuttings to soil once their roots are at least 1-3 inches long and have branched out a bit. If you wait too long, the water roots can become too accustomed to water and struggle more with the transition to soil.
Q: Why are my cuttings rotting instead of rooting? A: Rot is a common issue, often caused by overwatering, old water (in water propagation), or bacterial/fungal contamination. Ensure your tools are sterile, change water frequently, and avoid burying too much of the stem or having leaves submerged in water. For soil propagation, ensure excellent drainage.
Conclusion
Mastering the art of plant propagation is a skill that will empower you to grow, expand, and share your plant collection like never before. From the simple beauty of a Pothos stem rooting in water to the patient anticipation of a succulent leaf sprouting a new pup, each successful propagation is a small victory for any plant parent. You're not just creating new plants; you're cultivating a deeper understanding of botany, fostering a more sustainable hobby, and enriching your home with abundant greenery, all for free!
Remember, every plant's journey is unique, and sometimes propagation requires a bit of trial and error. Don't be discouraged by initial setbacks, but rather learn from them. With a little patience, the right tools, and the knowledge from this plant propagation guide, you'll soon be surrounded by a lush collection that you've personally nurtured from tiny beginnings. Ready to streamline your plant care, including keeping track of your new propagations? Discover Advanced Features with BenePlant's Premium Plan and let our AI-powered companion help you manage your ever-growing plant family with ease!
Share this article